Before we move any further, this blog post will consist of three parts: working and configuring StarWind VTL, working with IBM i and performing backup, and the final part will cover StarWind VTL with cloud offload.
Introduction
A bit of a history lesson to ensure we’re all on the same page regarding IBM i and its naming (yes, it can be really confusing). IBM i, without a doubt, has a special place in the IT world. Younger generations of system administrators may have very little knowledge of IBM i and can even consider it legacy. However, the latest IBM Power systems, as well as older AS/400 systems, are still utilized by many organizations due to their robust and reliable system architectures.
What is now known as IBM i was originally developed in 1988 as OS/400, as the sole operating system of the IBM AS/400 line of systems. Later on, around the 2000s, AS/400 was rebranded to IBM i Series, and then the OS itself was renamed i5/OS as AS/400 was renamed to eServer i5 in 2006. In 2008, its name was changed again to the current one — IBM i when IBM launched its Power Systems. The “i” in its name stands for “integrated.”
Besides the numerous features IBM i has, one of the native components is backups to various media including LTO. While LTO is king when it comes to archival, maintaining a physical tape infrastructure might be a complex and costly process. Virtual Tape Library (VTL) allows storing the data in a virtualized tape format on HDDs which decreases the associated physical tape costs and can further decrease them if cloud offload is available. Thus, archiving data to cost-efficient cloud object storage.
StarWind recently added a new virtual tape library into the build that emulates IBM 3584 TS3500 tape library, making it compatible with IBM i and offers cloud offload to public cloud providers such as AWS, Azure, backblaze B2 and Wasabi.
Hardware and software
The setup is quite simple and consists of two machines. First is the Windows Server 2019 machine filled with some HDDs. It will be used as a StarWind VTL target where I will install StarWind VTL and present virtual tapes over iSCSI. The second machine is IBM Power System S922 (9009-22A) based on POWER9™ processor-based technology. The OS version is IBM i 7.5. It will serve as our client (Initiator) and will connect StarWind tapes over iSCSI.
Configuring StarWind VTL
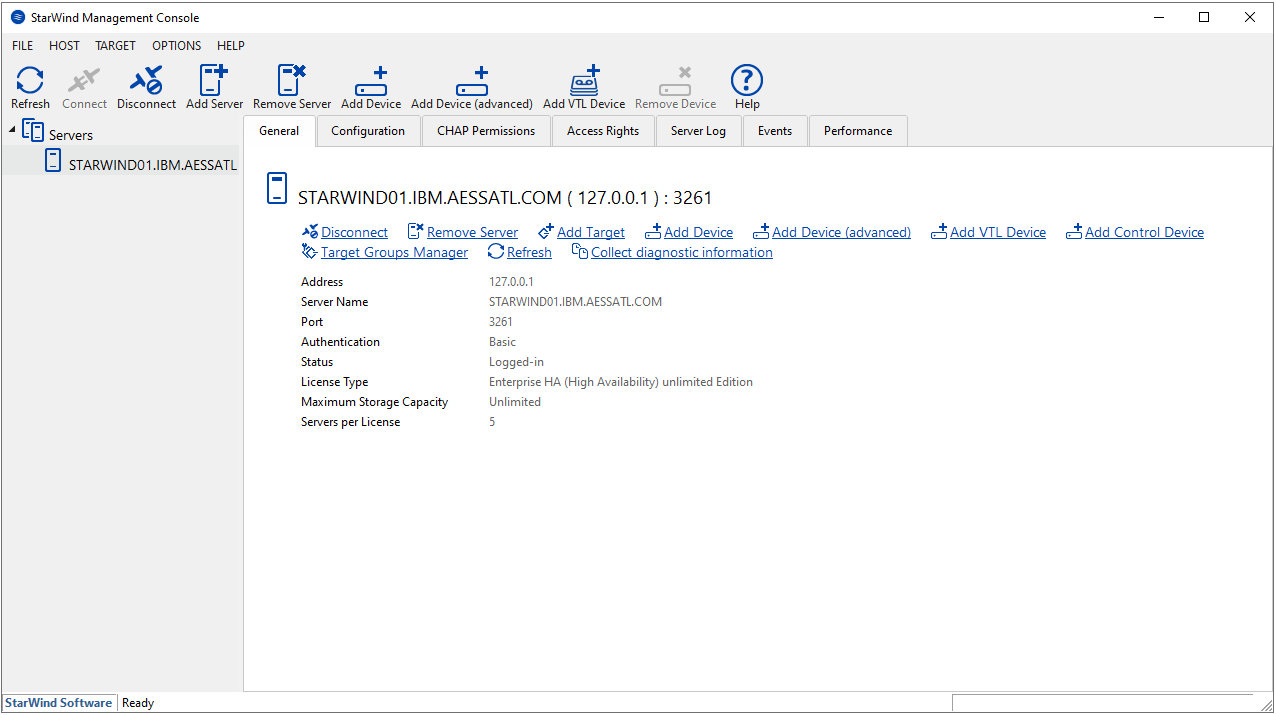
I have StarWind VTL already installed on the Windows Server machine so as not to waste time on the installation process. It’s very straightforward. So, the first thing to do is to create a VTL device. For this, we just select the “Add VTL Device” option.
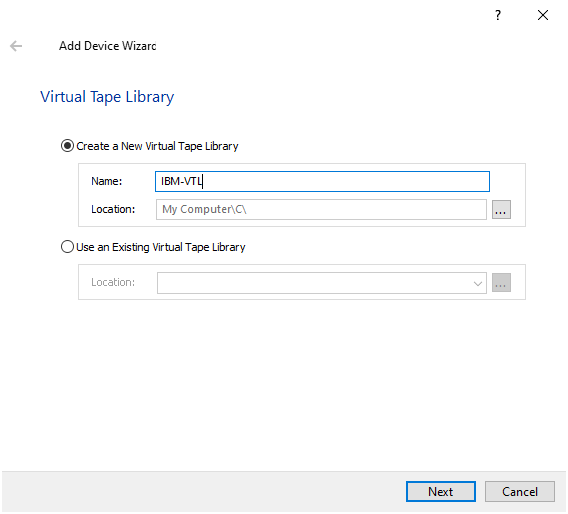
 Specify the name of our Virtual Tape Library. I’ll simply go with IBM-VTL for clarity. Also, make sure to select the proper drive to store StarWind tapes.
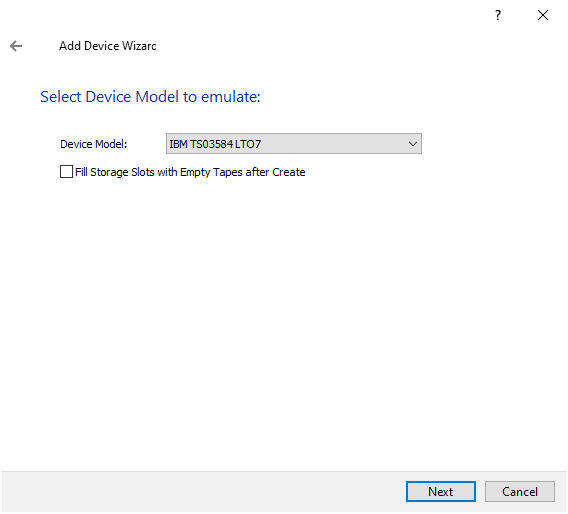
Now, select the IBM TSO3584LTO7 option. By default, it will fill all empty slots with tapes. I will uncheck this option and create a tape later manually.
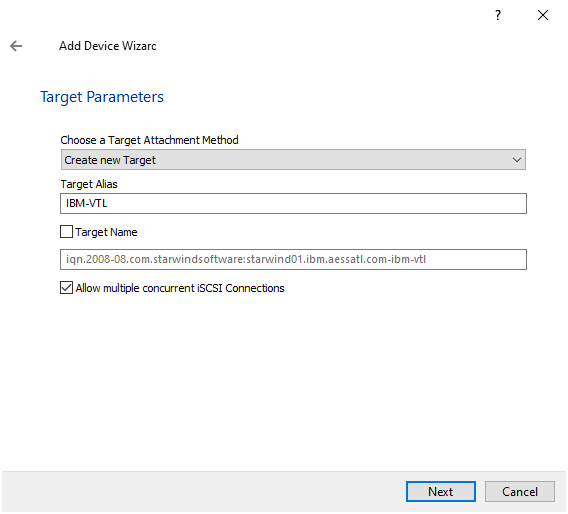
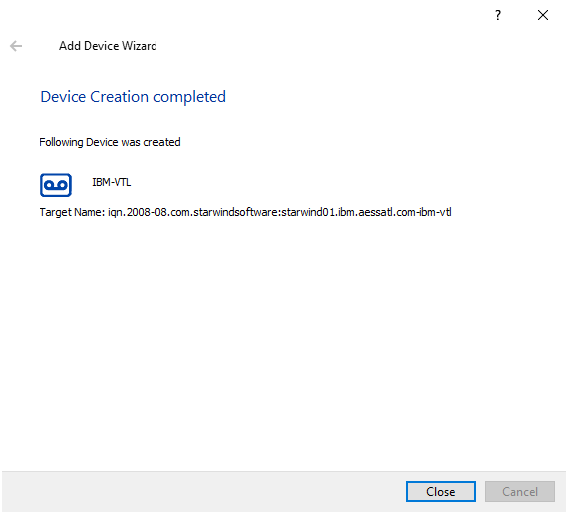
It will create a new Target. Also, copy the target IQN name to some text editor because we will need it later when connecting to IBM i. It’s possible to modify the target name at this step if required.
Here, just click “Create”.
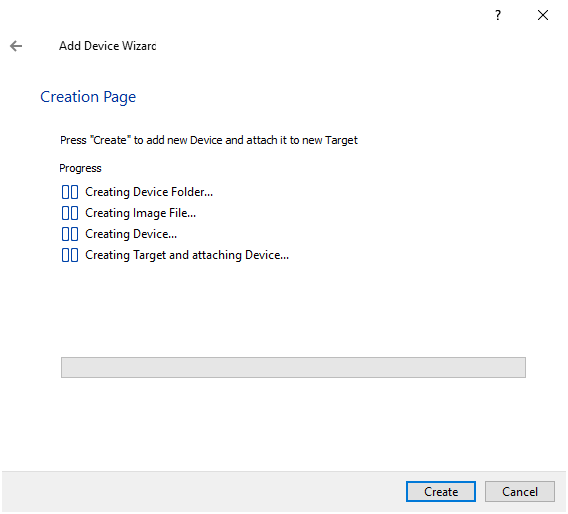
Our Virtual Tape Library is now created so we can hit “Close”.
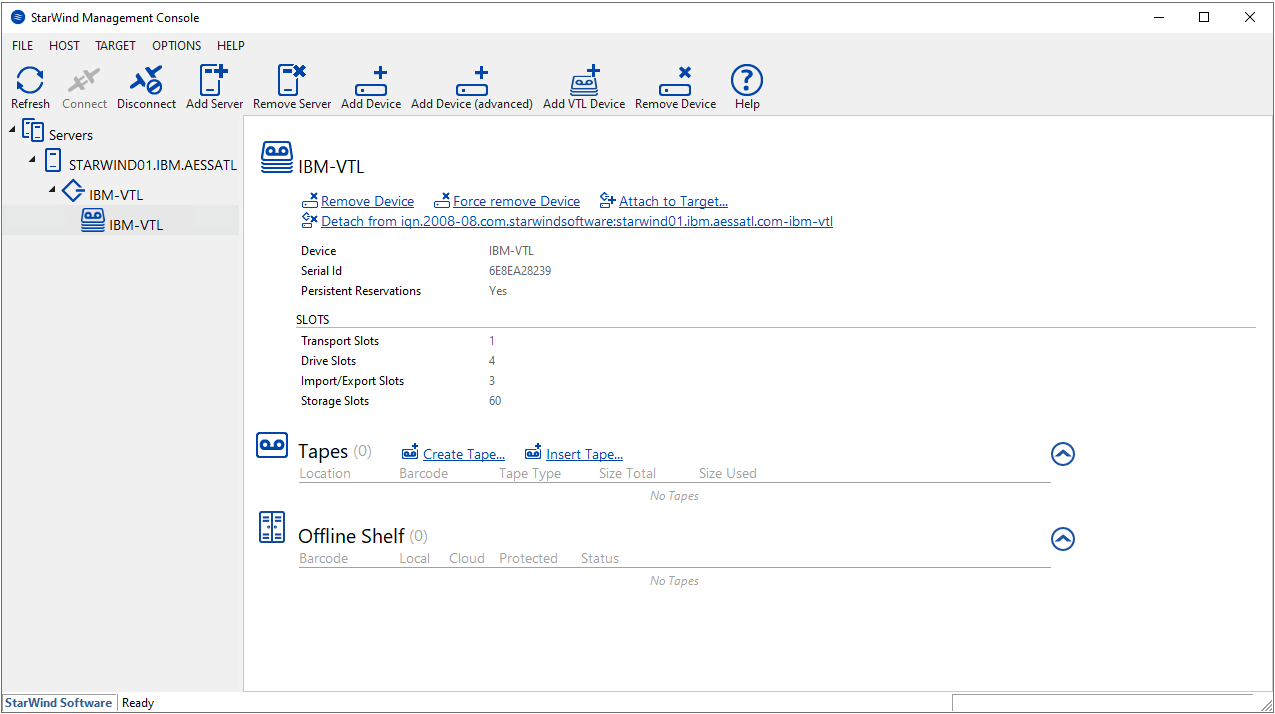
Now, since I unchecked the option to fill empty slots with tapes, I will create one tape manually. For this, we just need to click on the “Create Tape…” option.
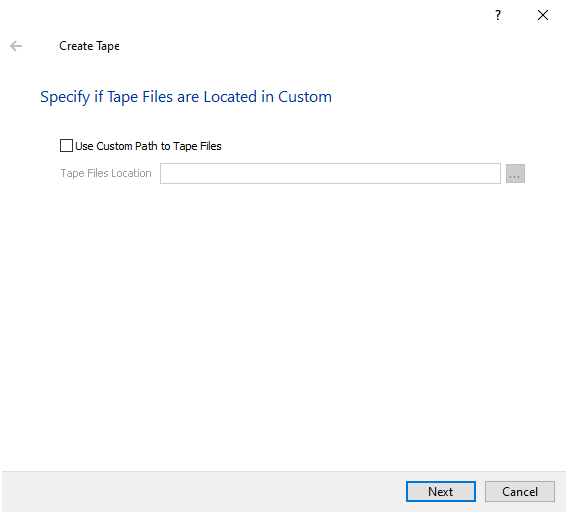
At this point, we can specify a different location for the tape if needed. I’m going to leave the default one.
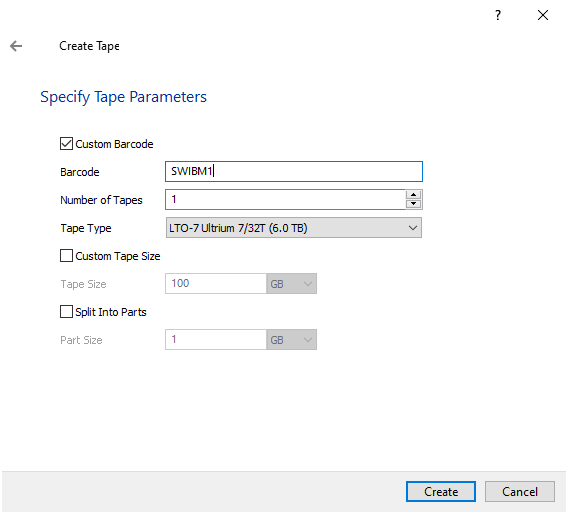
Here, we can specify a custom barcode. This is exactly what I have done to make sure that tapes are numbered properly and there will be no tape duplicates in IBM i. Our tape barcode is SWIBM1. It’s also possible to specify the number of tapes as well as other settings. I’m gonna go with a single tape for the demonstration. Once all is set, we can click “Create”.
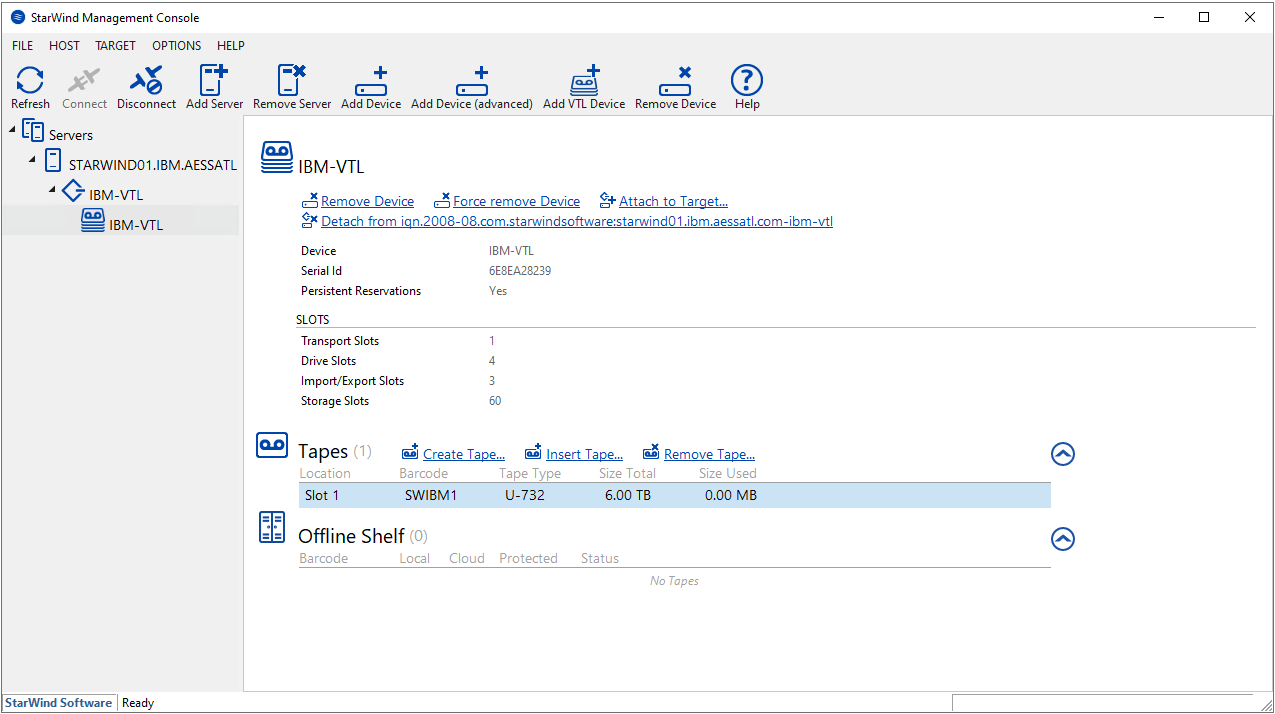
And we can see our new tape appeared under the tapes section with LTO7 format.
Summary
This is pretty much it when it comes to the StarWind VTL configuration. We have created our virtual tape library, added one tape with a custom barcode and it’s now ready for connecting to our IBM i machine. In the next part, I will cover the process of connecting StarWind VTL to IBM and how to perform a backup. Also, in the final third part, I will show how to configure cloud replication settings in StarWind VTL, so stay tuned!
from StarWind Blog https://ift.tt/bnfH0yX
via IFTTT
No comments:
Post a Comment