This article shows how to use the Packer tool to build CloudStack machine images or Golden Image.
Packer is an open-source community tool by Hashicorp for creating identical machine images for multiple platform from a single source configuration. This tool lands in the category of IaC Tools. Packer is lightweight, runs on every major operating system, and is highly performant, creating machine images for multiple platforms in parallel. Many customers use the tool as part of a CI/CD pipeline.
Packer is the only tool right now in the market which solely focuses on creating machine images and giving us the ability to automate the machine image creation process.
Packer automates the process of standing up a completely fresh VM and incorporates custom build scripts to customize the VM on the fly and then convert back to a template to use for deployments in either the cloud or on-premise.
Packer does not replace configuration management like Chef or Puppet. In fact, when building images, Packer is able to use tools like Chef or Puppet to install software onto the image.
All you need to start using it is to develop a Packer template using the HashiCorp Configuration Language (HCL) and ask the Packer tool to build an Image based on a template. In this article, we delve into the advantages of using Packer and how to build CloudStack Templates with it. Because Packer creates identical images for multiple platforms, you can run production in your private cloud based on CloudStack, in a hybrid cloud environment, or your Test/Dev environment. Each environment is running an identical machine image, giving ultimate portability.
Advantages of using the Packer tool:
1. Immutable Infrastructure: Packer helps in creating machine images (AMIs, Docker containers, VirtualBox images, etc.) that are consistent and immutable. This means once an image is built, it remains unchanged throughout its lifecycle, reducing the risk of configuration drift and making deployments more reliable.
2. Automation: Packer allows you to automate the process of creating machine images, reducing manual intervention and ensuring consistency across environments. This automation saves time and reduces the chance of human error.
3. Infrastructure as Code (IaC): With Packer, you can define your image configurations in code, typically using JSON or HCL (HashiCorp Configuration Language). This enables you to version control your infrastructure configurations and apply the best practices of software development.
4. Integration with Configuration Management Tools: Packer integrates well with configuration management tools like Ansible, Chef, and Puppet. This allows you to provision and configure software within your images, ensuring they are fully configured and ready for use upon deployment.
5. Fast and Consistent Builds: Packer builds images in parallel, leveraging techniques like artifact caching and incremental builds to speed up the process. This ensures that your images are consistently built and can be deployed rapidly, improving the overall efficiency of your deployment pipeline.
6. Security and Compliance: By using Packer to build standardized images with security practices built-in, you can ensure that your infrastructure adheres to security and compliance standards from the start. This reduces the risk of security vulnerabilities and makes auditing and compliance reporting easier.
Installing Packer
The Packer tool is available on most of the popular platforms, and installing it is easy and simple.
We recommend following the official documentation to install the packer tool:
https://developer.hashicorp.com/packer/tutorials/docker-get-started/get-started-install-cli
In this tutorial, we are using a Mac, where Homebrew can be used to install Packer. All you need is to run the following commands after installing the latest version of Homebrew.
brew tap hashicorp/tap
brew install hashicorp/tap/packer
Once Packer is installed, you can verify the installation by executing the following commands:
➜ ~ packer
Usage: packer [–version] [–help] <command> [<args>]
Available commands are:
build build image(s) from template
console creates a console for testing variable interpolation
fix fixes templates from old versions of packer
fmt Rewrites HCL2 config files to canonical format
hcl2_upgrade transform a JSON template into an HCL2 configuration
init Install missing plugins or upgrade plugins
inspect see components of a template
plugins Interact with Packer plugins and catalog
validate check that a template is valid
version Prints the Packer version
➜ ~ packer version
Packer v1.9.2
Packer Integration with Apache CloudStack
Packer relies on plugins called Providers to provision or manage resources in the cloud. As part of the integration between Terraform and Apache CloudStack, Packer requires a CloudStack specific provider which acts as a transition layer between Packer and CloudStack.
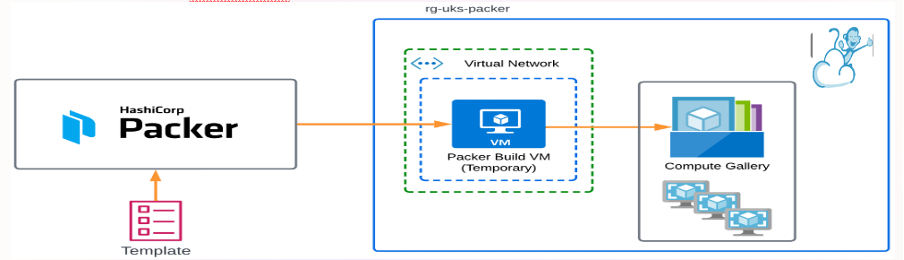
An example setup to integrate Packer and Apache CloudStack
The previous versions of Packer supported JSON for templating. However, the current version of packer recommends using HCL instead. HCL can be used to write templates not only for Packer but also in other tools of HashiCorp, like Terraform.
An HCL template file uses .hcl as the extension. In the case of Packer, the file name uses .pkr.hcl as the extension. Let us name our template file docker.pkr.hcl.
In this article, we will see the usage of Packer in building a Customized CloudStack Template. The source code used in this article can be found at: https://github.com/kiranchavala/cloudstack-marketplace-templates/blob/main/docker-22-04.pkr.hcl
packer {
required_plugins {
cloudstack = {
version = “>= 1.0.0”
source = “github.com/hashicorp/cloudstack”
}
}
}
source “cloudstack” “docker-template” {
api_key = var.cloudstack_api_key
api_url = var.cloudstack_api_url
network = var.network
secret_key = var.cloudstack_secret_key
service_offering = var.service_offering
source_template = var.source_template
ssh_username = “root”
ssh_password = “password”
template_os = var.template_os
zone = var.zone
expunge = true
communicator = “ssh”
ssh_timeout = “20m”
template_name = “Docker-Ubuntu22-04”
template_public = “true”
template_display_text = “Docker-Ubuntu22-04”
template_featured = “true”
template_password_enabled = “true”
}
build {
sources = [“source.cloudstack.docker-template”]
}
The above template consists of two blocks, namely, source and build. An HCL block also contains arguments inside the curly braces. The arguments vary depending on the kind of block.
In our case, the source block specifies the type of source, namely ‘cloudstack’. It implies that we are going to use a packer provider for CloudStack. Packer detects this information and tries to interact with CloudStack.
The Packer source block also describes the source template from which a new customized template is to be built.
In our case, we have specified the source_template that is to be used for launching a vm with the specified service offering to build the new customized golden image. We also have specified the credentials for the source template that is to be used as the username for connecting to the instance for further provisioning, if any. Though we specified the zone, Packer can actually detect this information along with the CloudStack security credentials. These credentials are required for the Packer to connect to CloudStack. Finally, the template_name indicates the name that we want to give to the new AMI.
In summary, Packer connects to CloudStack using the security credentials, spins an instance, deploys the source template on it, and builds the new template named Docker-Ubuntu22-04.
The other block in our template is the build block.
It has only one argument, namely, sources here we specify it as “source.cloudstack.docker-template”. Packer builds the Template based on these sources.
Once the packer template file is ready, run the following command in the folder where the template file is located. It downloads any plugins that are required.
packer init or
packer plugins install github.com/hashicorp/cloudstack
We can also verify if the template file is valid.
packer validate docker-22-04.pkr.hcl
A valid template file can be formatted properly according to HCL style using the following command:
packer fmt docker-22-04.pkr.hcl
After initialization and validation, we are all set to build the actual images.
packer build docker-22-04.pkr.hcl
The command given above takes a few minutes to finish as it involves interaction with CloudStack, spinning a new vm, deploying the source template, and building the new template.
packer build docker-22-04.pkr.hcl
cloudstack.docker-template: output will be in this color.
==> cloudstack.docker-template: Preparing config…
cloudstack.docker-template: Config has been prepared!
==> cloudstack.docker-template: Not using a keypair
==> cloudstack.docker-template: Creating instance…
cloudstack.docker-template: Instance has been created!
cloudstack.docker-template: Instance ID: aacf9fb5-2181-46ce-8944-057aae9a32ec
==> cloudstack.docker-template: Setup networking…
cloudstack.docker-template: Associating public IP address…
cloudstack.docker-template: Creating port forward…
cloudstack.docker-template: Creating firewall rule…
cloudstack.docker-template: Networking has been setup!
==> cloudstack.docker-template: Using SSH communicator to connect: 10.0.54.126
==> cloudstack.docker-template: Waiting for SSH to become available…
==> cloudstack.docker-template: Connected to SSH!
==> cloudstack.docker-template: Provisioning with shell script: /var/folders/2f/6r19_y2s5p92vdzq4l29n0lr0000gn/T/packer-shell2697990336
cloudstack.docker-template:
cloudstack.docker-template: status: done
==> cloudstack.docker-template: Uploading ./common/files/var/ => /var/
==> cloudstack.docker-template: Uploading ./docker-22-04/files/etc/ => /etc/
==> cloudstack.docker-template: Provisioning with shell script: ./common/scripts/010-docker.sh
==> cloudstack.docker-template: Shutting down instance…
cloudstack.docker-template: Instance has been shutdown!
==> cloudstack.docker-template: Creating template: Docker-Ubuntu22-04
cloudstack.docker-template: Retrieving the ROOT volume ID…
cloudstack.docker-template: Creating the new template…
cloudstack.docker-template: Template has been created!
==> cloudstack.docker-template: Cleanup networking…
cloudstack.docker-template: Deleting firewall rule…
cloudstack.docker-template: Deleting port forward…
cloudstack.docker-template: Releasing public IP address…
cloudstack.docker-template: Networking has been cleaned!
==> cloudstack.docker-template: Deleting instance…
==> cloudstack.docker-template: Expunging instance…
cloudstack.docker-template: Instance has been deleted!
Build ‘cloudstack.docker-template’ finished after 5 minutes 55 seconds.
==> Wait completed after 5 minutes 55 seconds
==> Builds finished. The artifacts of successful builds are:
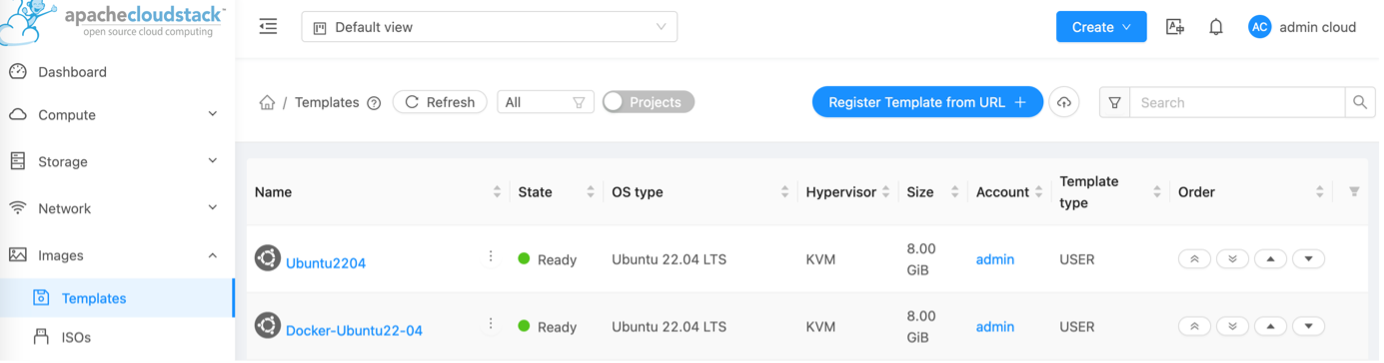
–> cloudstack.docker-template: A template was created: Docker-Ubuntu22-04
It will be listed under Images > Templates >:
Using variables
The Packer HCL template files can also define and use variables for reusability. For example, the service_offering in the following template is referred to as a variable named var.service_offering.
variable “service_offering” {
description =”Service Offering UUID”
default=”9c870dca-a857-468c-a804-29b256af6b53″
}
Customizing the Source template
The real reason for us to use Packer is to create custom templates. We have already talked about immutable VMs. In the approach above, we build a new custom template with all the required provisioning.
Ubuntu does not come with a Docker engine installed. Let us make our new images Docker ready. For this, we need to add provisioning in the template file. Keep the source blocks as they are and edit the build block as follows in the docker-22-04.pkr.hcl file.
provisioner “shell” {
environment_vars = [“application_name=${var.application_name}”, “application_version=${var.application_version}”, “docker_compose_version=${var.docker_compose_version}”, “DEBIAN_FRONTEND=noninteractive”, “LC_ALL=C”, “LANG=en_US.UTF-8”, “LC_CTYPE=en_US.UTF-8”]
scripts = [“${path.root}/common/scripts/010-docker.sh”, “${path.root}/common/scripts/011-docker-compose.sh”, “${path.root}/common/scripts/012-grub-opts.sh”, “${path.root}/common/scripts/013-docker-dns.sh”, “${path.root}/common/scripts/014-ufw-docker.sh”, “${path.root}/common/scripts/020-application-tag.sh”, “${path.root}/common/scripts/900-cleanup.sh”]
}
As you can see, both the shell provisioners are run before building the template. Also, it can be found from the output that Packer logged into the instance using SSH and ran the scripts to install dockers.
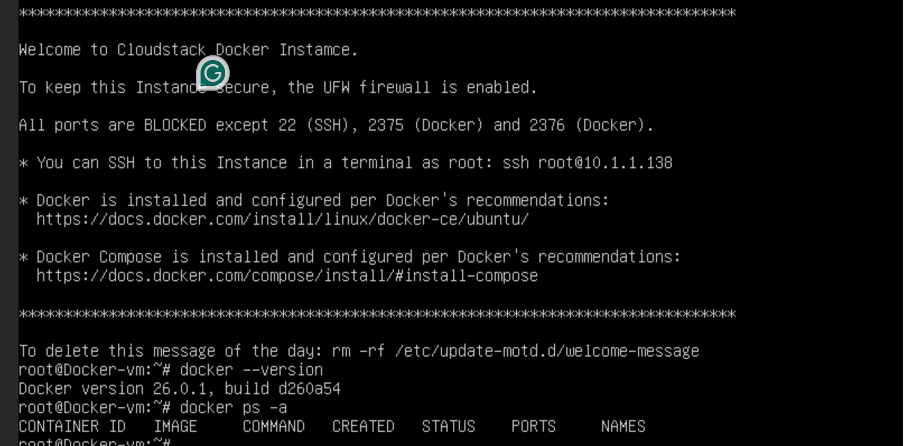
We can verify if the provisioning is done properly. For that, log in to the CloudStack UI console, launch an instance using the newly built Template (Docker-Ubuntu22-04)
Check if docker is installed and running.
In this article, we have seen the usage of Packer tool in building a Golden image on CloudStack. It is a powerful tool that streamlines the process of image creation, ensuring consistency and efficiency in software deployment. Its adoption can significantly enhance infrastructure management and deployment strategies.
It is one of the core DevOps tools that is widely used around the world to maintain an immutable cloud infrastructure. It speeds up the CICD process with instant server initialization, eliminating the hectic task of running configurations each time a machine is set up.
References:
https://github.com/hashicorp/packer-plugin-cloudstack
https://developer.hashicorp.com/packer/integrations/hashicorp/cloudstack
https://github.com/kiranchavala/cloudstack-marketplace-templates/blob/main/docker-22-04.pkr.hcl
https://github.com/kiranchavala/cloudstack-marketplace-templates
The post Automating Infrastructure with CloudStack and Packer appeared first on ShapeBlue.
from CloudStack Consultancy & CloudStack... https://ift.tt/hl8Ea3n
via IFTTT
No comments:
Post a Comment