This tutorial describes how to configure CloudStack together with Minio Object Storage bucket to host a static website. MinIO is an Apache licensed open-source distributed object server, designed to be compatible with Amazon S3, which makes it easy to have the same API interface
Static websites do not need server-side programming and databases. They contain HTML pages, style-sheets and pictures.
Static web design is the easiest way to represent your blog, business and work online, for businesses and individuals who simply want to put simple information about themselves or their business on the web.
Advantages of Static Websites:
1. Simplicity: Static websites are straightforward to create and maintain.
2. Fast Loading: Since the content is pre-rendered, they usually load quickly.
3. Security: Static websites are less prone to certain types of attacks since they lack server-side components.
Advantages of MinIO:
1. High Performance: MinIO ensures high-speed data transfer through its distributed architecture and optimized features. This makes it ideal for fast data access and processing.
2. Scalability: MinIO can easily scale by adding low-cost hardware components. As the data volume increases, new nodes can be added, allowing the system to expand.
3. Durability: MinIO stores data in a distributed manner to ensure data security. This minimizes the risk of data loss and provides high data durability.
4. Compatibility: MinIO seamlessly integrates with existing applications as it is compatible with the Amazon S3 APIs. Transitioning from existing S3-based applications to MinIO is quick and effortless.
5. User-Friendly: MinIO is easy to use and manage. It provides a web-based interface that offers a user-friendly experience. Additionally, it offers advanced features and APIs.
6. Flexible Storage Options: MinIO provides a wide range of storage options. It can be used for object storage, file storage, or block storage, catering to different scenarios.
Objectives
This tutorial provides a comprehensive walk-through for hosting a static website on CloudStack using MinIO.
• Install a MinIO server and MinIO client tool
• Create a MinIO object storage bucket from CloudStack
• Upload the static website files to the object storage bucket
• Launch a Ubuntu Instance in CloudStack
• Configure Nginx webserver application on Ubuntu Instance to server static site content
Install a MinIO server and MinIO client
There are a couple of ways in which you can run MinIO. In this tutorial, we will be using the binaries for Ubuntu 22.04.
- Launch an Ubuntu 22.04 vm
- Install the MinIO server
wget https://dl.min.io/server/minio/release/linux-
amd64/archive/minio_20240330094156.0.0_amd64.deb -O minio.deb
sudo dpkg -i minio.deb
- Launch MinIO server
mkdir ~/minio

minio server ~/minio --console-address :9001
The mkdir command creates the folder explicitly at the specified path.
The minio server command starts the MinIO server. The path argument ~/minio identifies the folder in which the server operates.
The minio server process prints its output to the system console, similar to the following:
API: http://10.0.32.251:9000  http://127.0.0.1:9000

RootUser: minioadmin

RootPass: minioadmin

Console: http://10.0.32.251:9001 http://127.0.0.1:9001

RootUser: minioadmin

RootPass: minioadmin
- Connect Your Browser to the MinIO Server
- Open http://10.0.32.251:9001 in a web browser to access the MinIO UI

- Navigate to User > Access Keys
Create access key

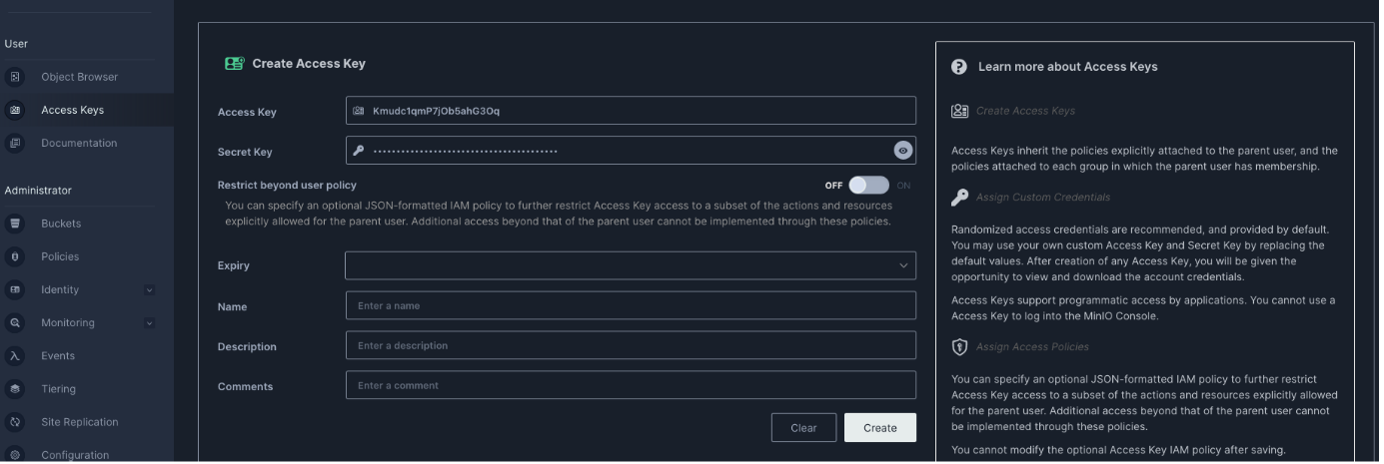
Note the Access key and Secret Key
- (Optional) Install the MinIO Client
- The MinIO client allows you to work with your Minio server from the command line
Download the mc client
wget https://dl.min.io/client/mc/release/linux-amd64/mc

chmod +x mc

sudo mv mc /usr/local/bin/mc


mc alias set minio-server http://10.0.32.251:9000 minioadmin minioadmin

mc admin info minio-server
Create a Minio object storage bucket from CloudStack
Make sure the CloudStack Management server is able to reach the minio-server.
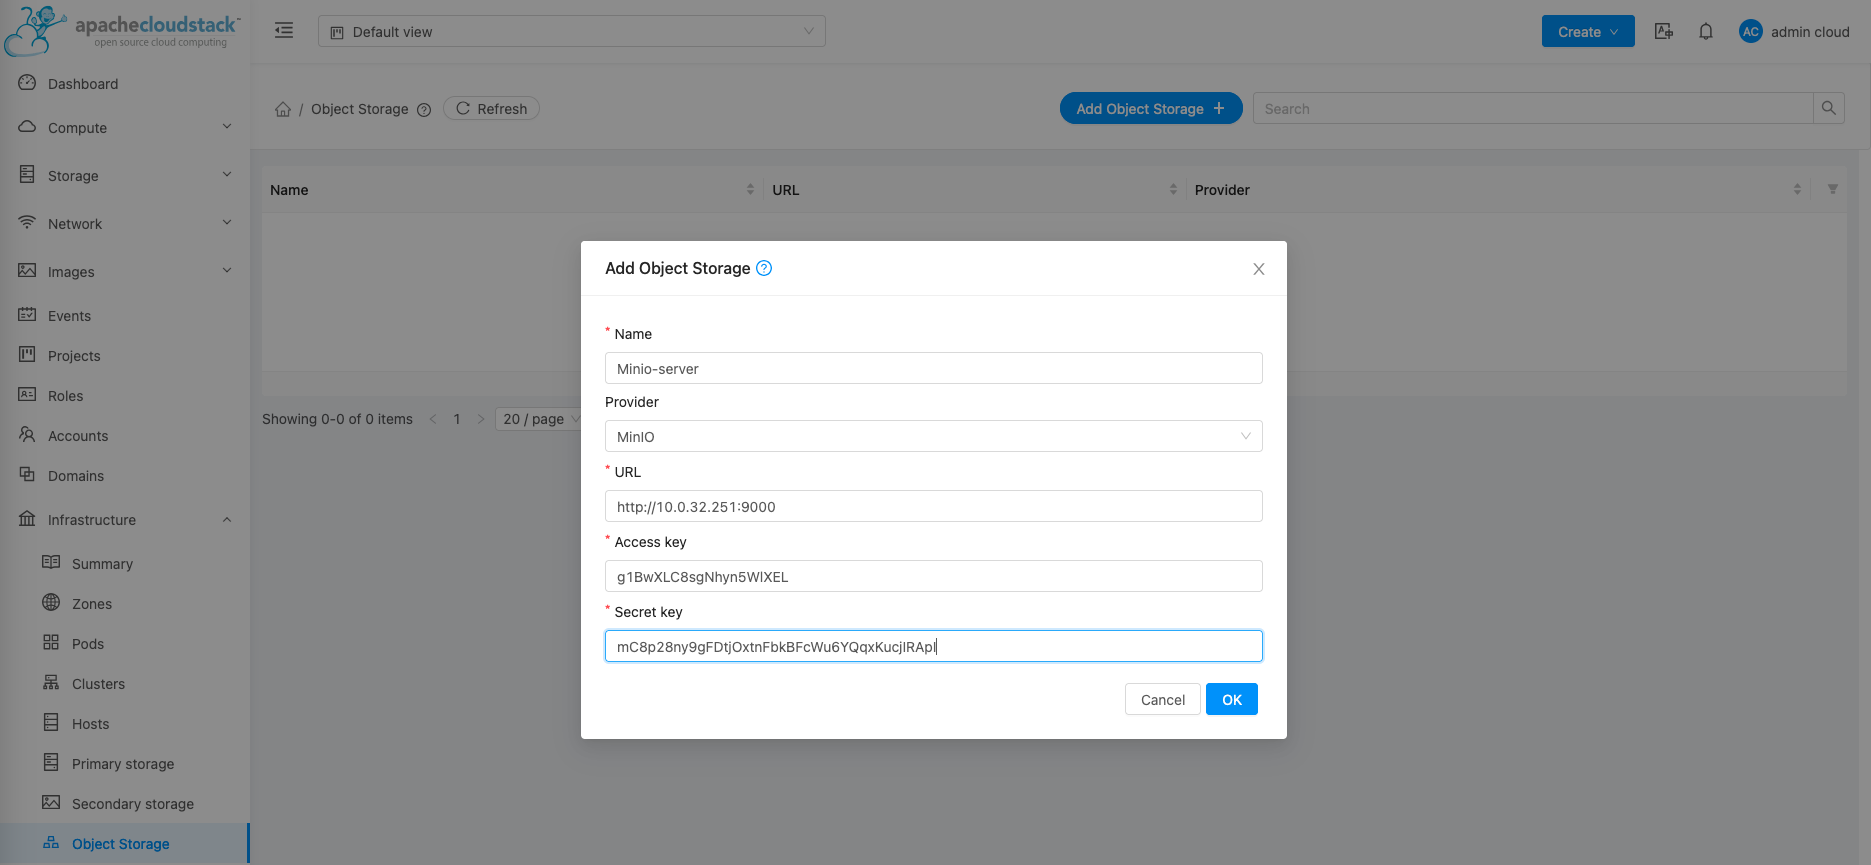
- Navigate to Infrastructure > Object storage > Add Object storage
Provide the url, access key and secret key which you got in the previous step.
- Navigate to Storage > Buckets > Create Bucket
Provide the name, and select the bucket policy as Public
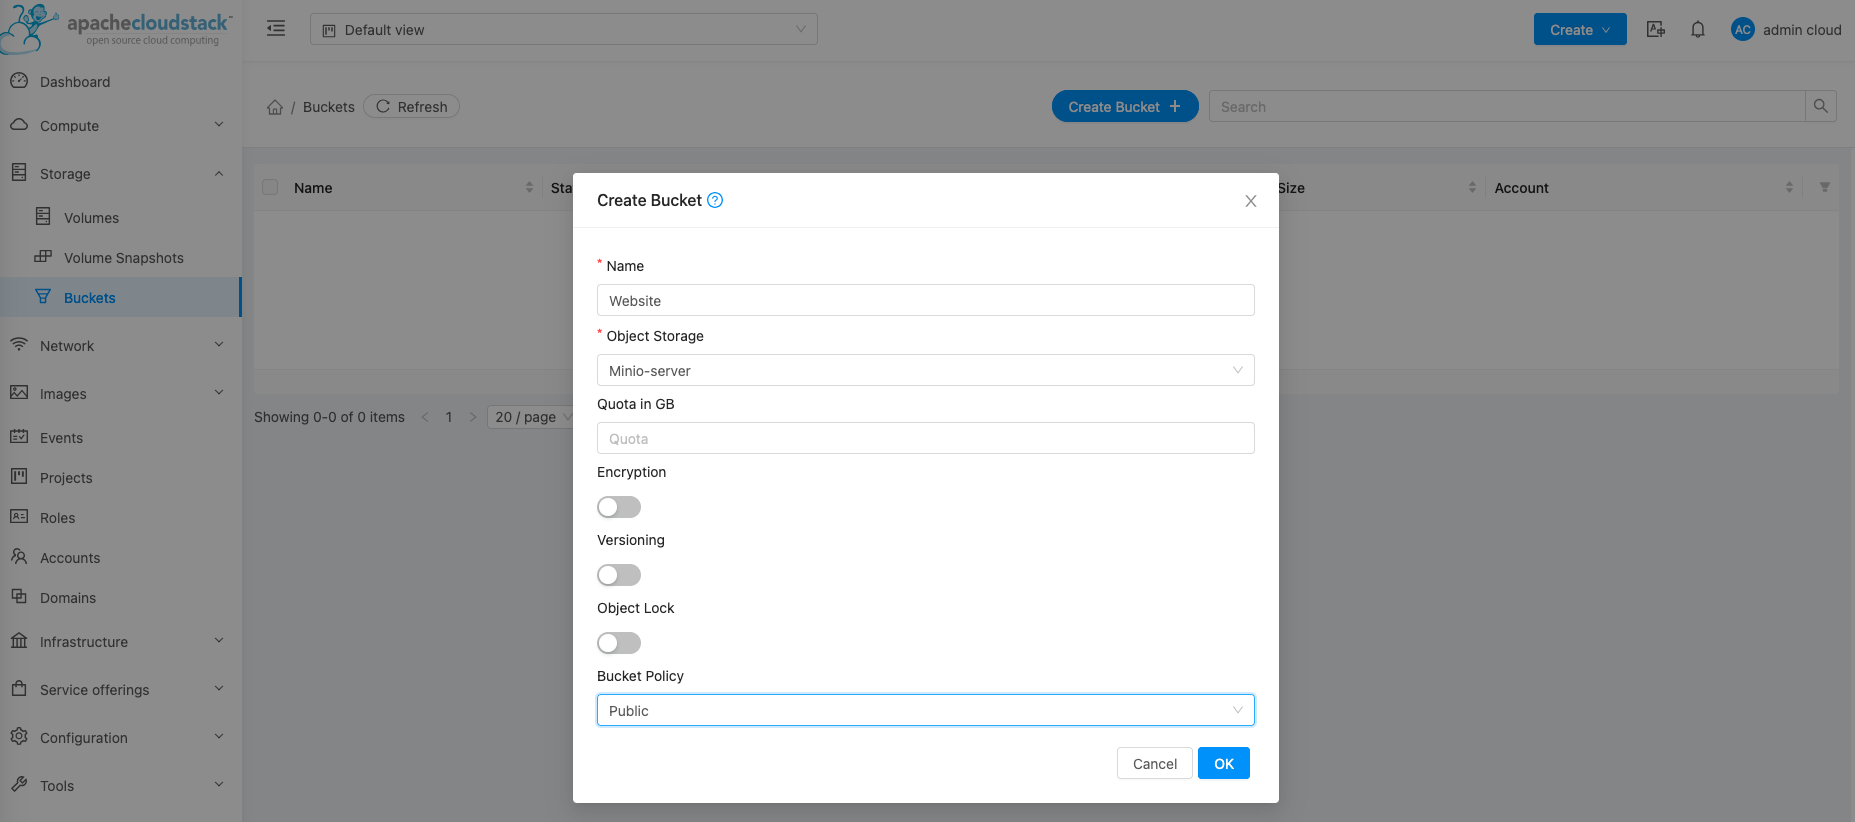
Upload the static website files to the object storage bucket
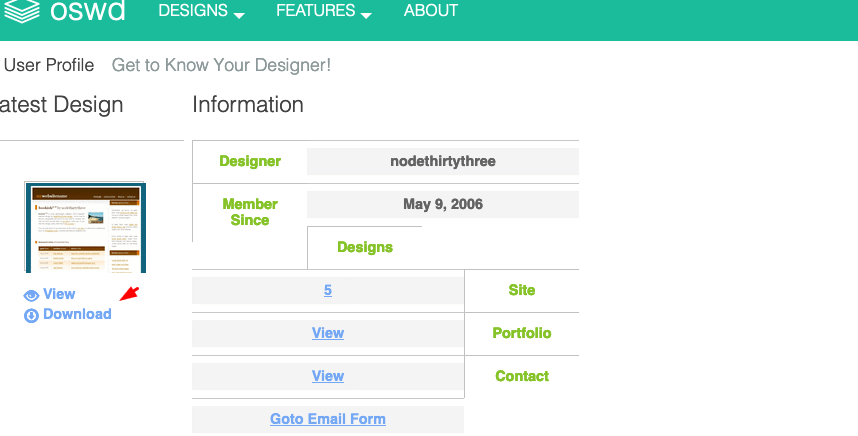
• Visit https://www.oswd.org/ and browse designs
• Click on any design and select download
For example:
https://www.oswd.org/user/profile/id/12362/
• Unzip the downloaded file
• We can either use the MinIO client to copy the files to the object storage bucket we have created or use the CloudStack UI to upload the files
• Using the MinIO Client, copy the folder to the bucket and verify if the objects are present
$ mc cp -r Redtie/ minio-server/website
...ma/readme.txt: 39.37 KB / 39.37 KB ┃▓▓▓▓▓▓▓▓▓▓▓▓▓▓▓▓▓▓▓▓▓▓▓▓▓▓▓▓▓▓▓▓▓▓▓▓▓┃

100.00% 31.94 KB/s 1s


$ mc ls minio-server/website
[2024-04-02 10:54:57 IST] 4.9KiB STANDARD default.css
[2024-04-02 10:54:58 IST] 5.6KiB STANDARD index.html
[2024-04-02 10:54:58 IST] 609B STANDARD readme.txt
[2024-04-02 10:55:07 IST] 0B images/
- From the CloudStack UI, you can upload the files by navigating to Storage > Buckets > Browser > Upload

Launch an Ubuntu Instance in CloudStack
- Create an isolated network
Navigate to Network > Guest Network > Add Network > Isolated
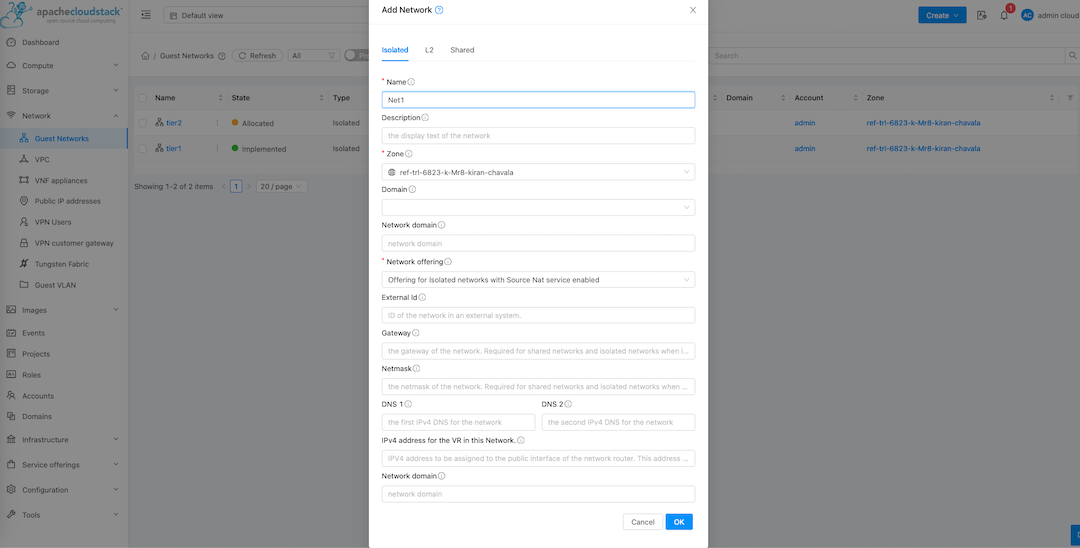
- Navigate to Compute > Instances > Add Instance
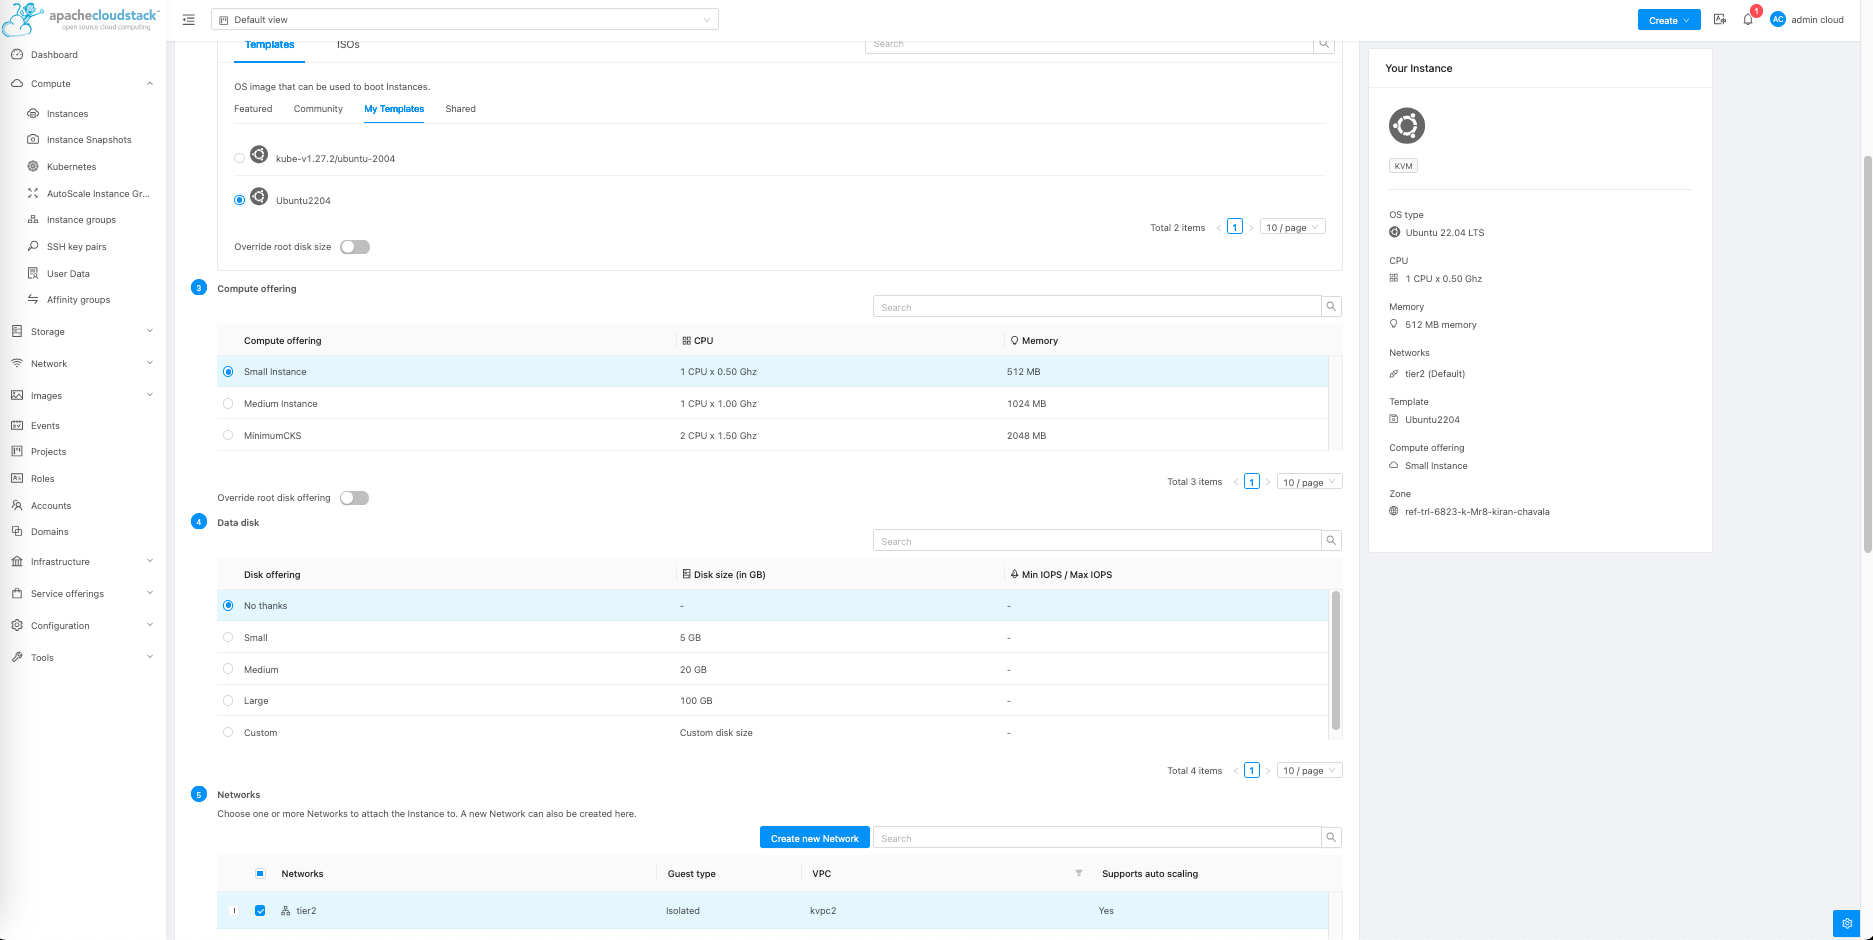
- Acquire a public ip to the Isolated network
Navigate to Network > Guest Network > Select the Isolated network > Public Ip Address > Acquire a new ip

- Enable Static Nat and Firewall rules on the Public ip address

Select the webserver vm (ubuntu instance) when enabling static nat
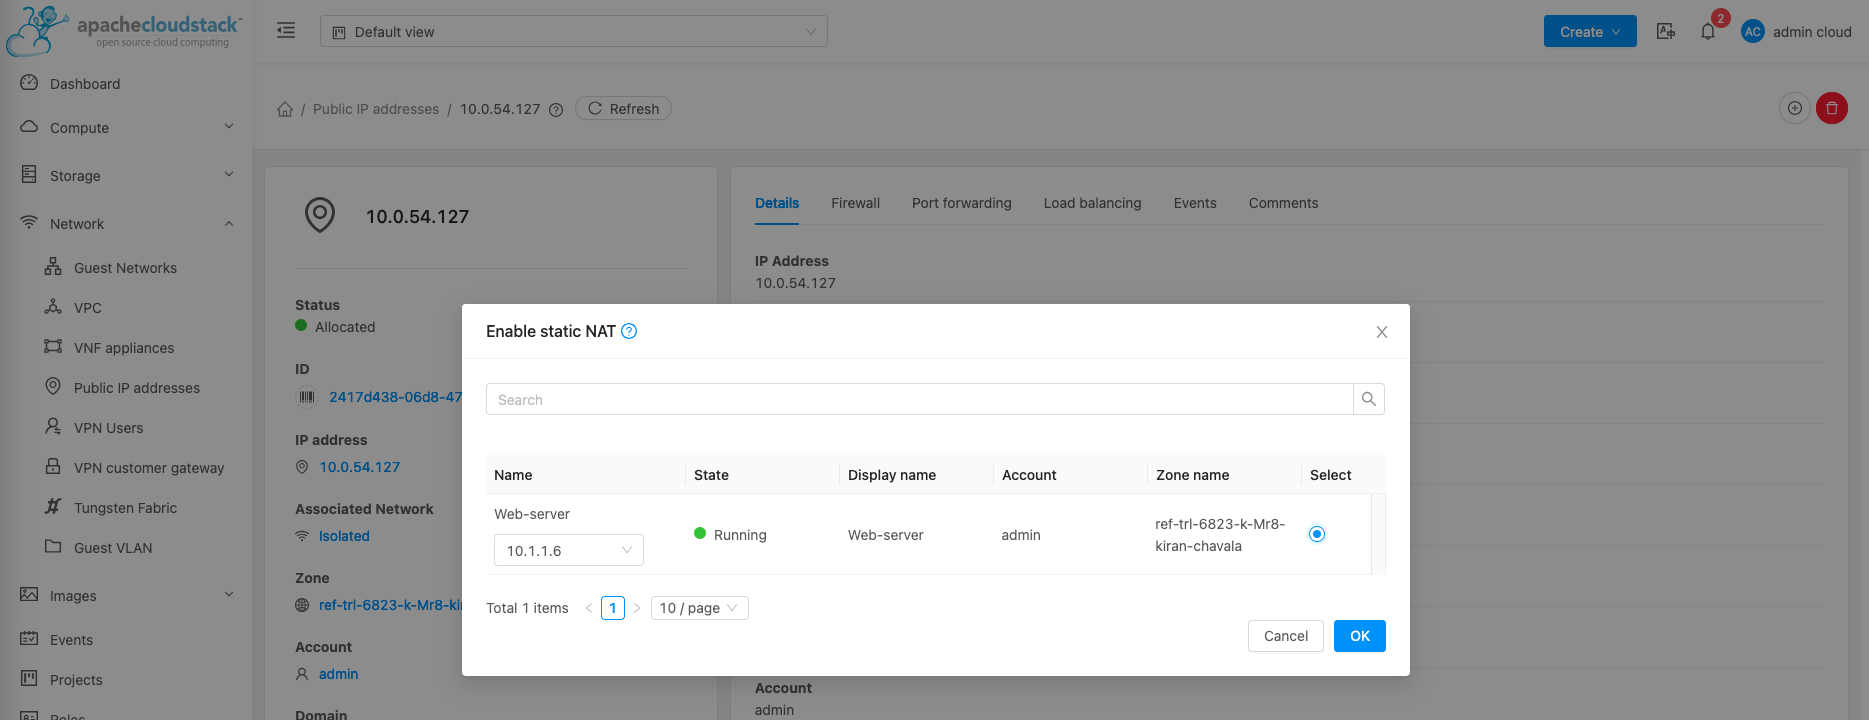
- Open the firewall port for ssh and http

Configure Nginx webserver application on Ubuntu Instance to server static site content
- Login to the Ubuntu instance and install nginx and configure in such a way that it points to the object storage
$ ssh root@10.0.54.124
$ apt update
$ apt install nginx
$ cat /etc/nginx/sites-enabled/default
server {
listen 80;
server_name localhost;
location / {
rewrite ^/$ /static/index.html break;
proxy_set_header Host $http_host;
proxy_pass http://10.0.32.251:9000/website/;
}
}

$ service nginx reload
open your browser and type http://10.0.54.127/
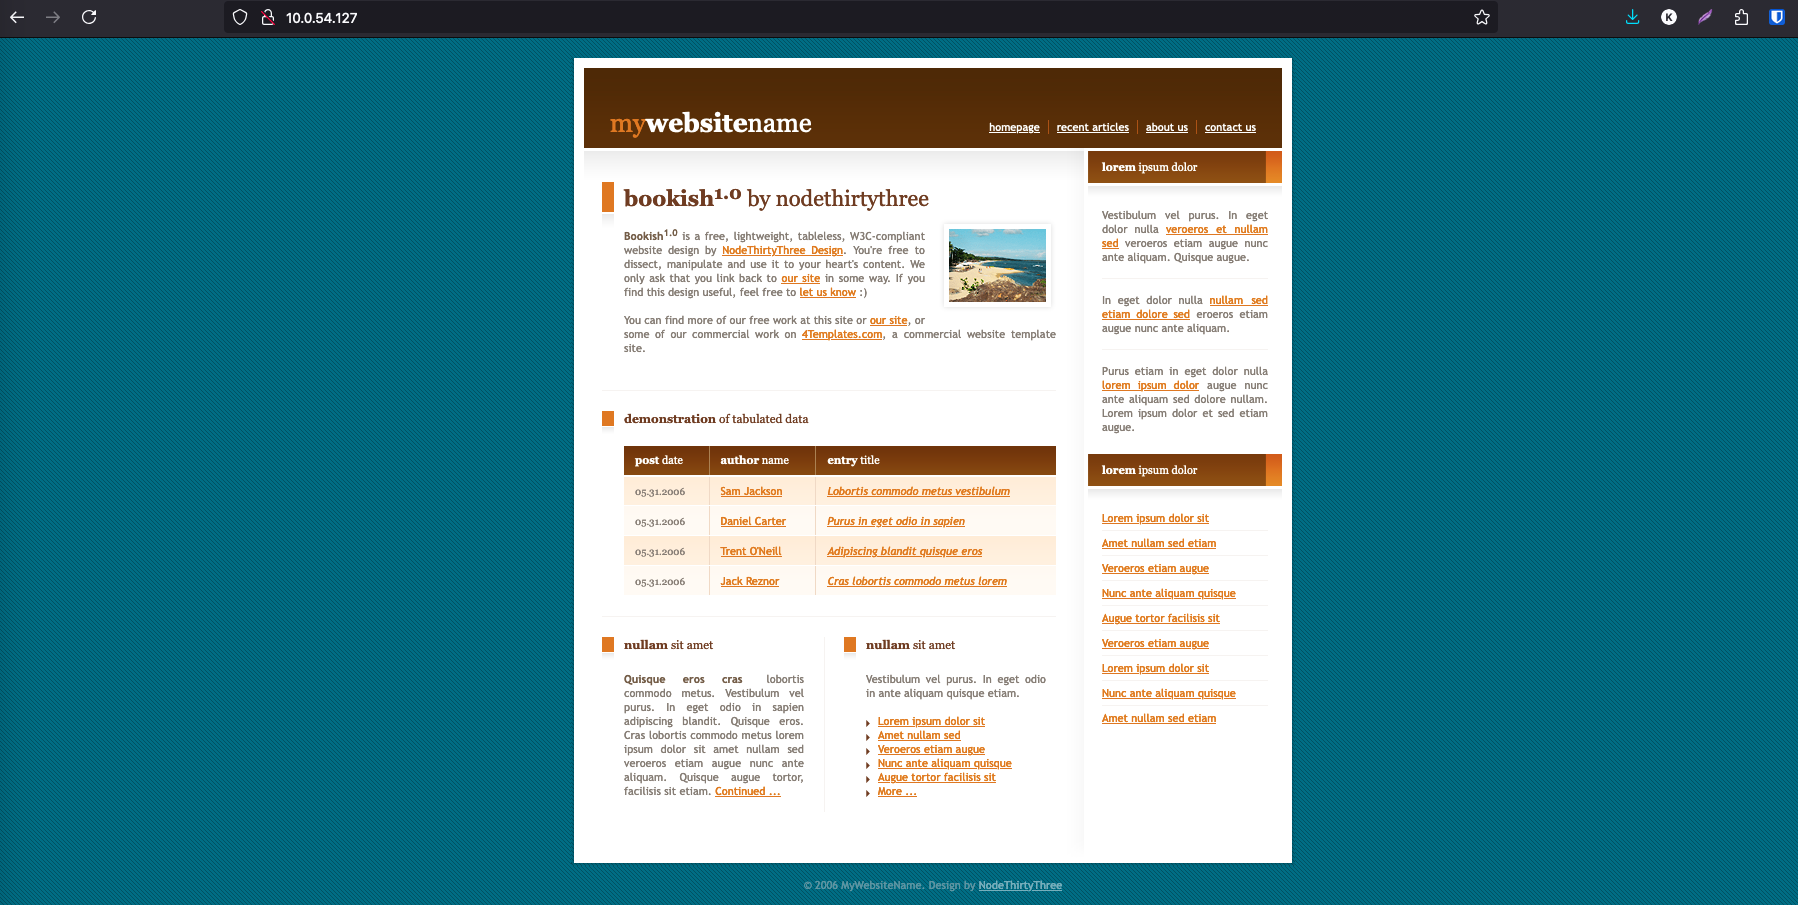
If you require to change the content of the static site, you have to replace the files present in the object store.
In this article we have seen how easy it is to host static websites on CloudStack with the help of MinIO. MinIO is a high-performance, scalable, and user-friendly solution that meets modern data storage needs. It can be effectively utilized in various use cases such as static site hosting, big data analytics, cloud-based applications, data backup and recovery. The advantages of MinIO empower users to strengthen their data management strategies and play a crucial role in ensuring data security and accessibility.
The post Hosting a Static Website using CloudStack and MinIO appeared first on ShapeBlue.
from CloudStack Consultancy & CloudStack... https://ift.tt/F8yaUpv
via IFTTT
No comments:
Post a Comment